
Install the Amplify CLI
Before you can use AWS resources, you must Create AWS Account, which is free and automatically gives you access to the AWS Free Tier.
Once you’ve created your AWS account, you are ready to install the Amplify CLI on your machine. Open your Terminal and paste the following snippet and pressing Enter:
curl -sL https://aws-amplify.github.io/amplify-cli/install | bash && $SHELLYour machine will begin to install the Amplify CLI on your machine. It gives you the ability to create, manage, and delete Amplify resources in an easily configurable way.
Configure Amplify CLI
Now that the Amplify CLI is installed on your machine, you need to configure it to connect to your AWS account. Run the following command in your terminal:
amplify configureYour default browser will open and request that you sign into your AWS account if you haven’t already done so, and hit Enter to continue. After the browser has confirmed that you are signed in, you can return to the terminal and answer the prompts:
Specify the AWS Region
? region: <Your preferred region>
Specify the username of the new IAM user:
? user name: <User name for Amplify IAM user>
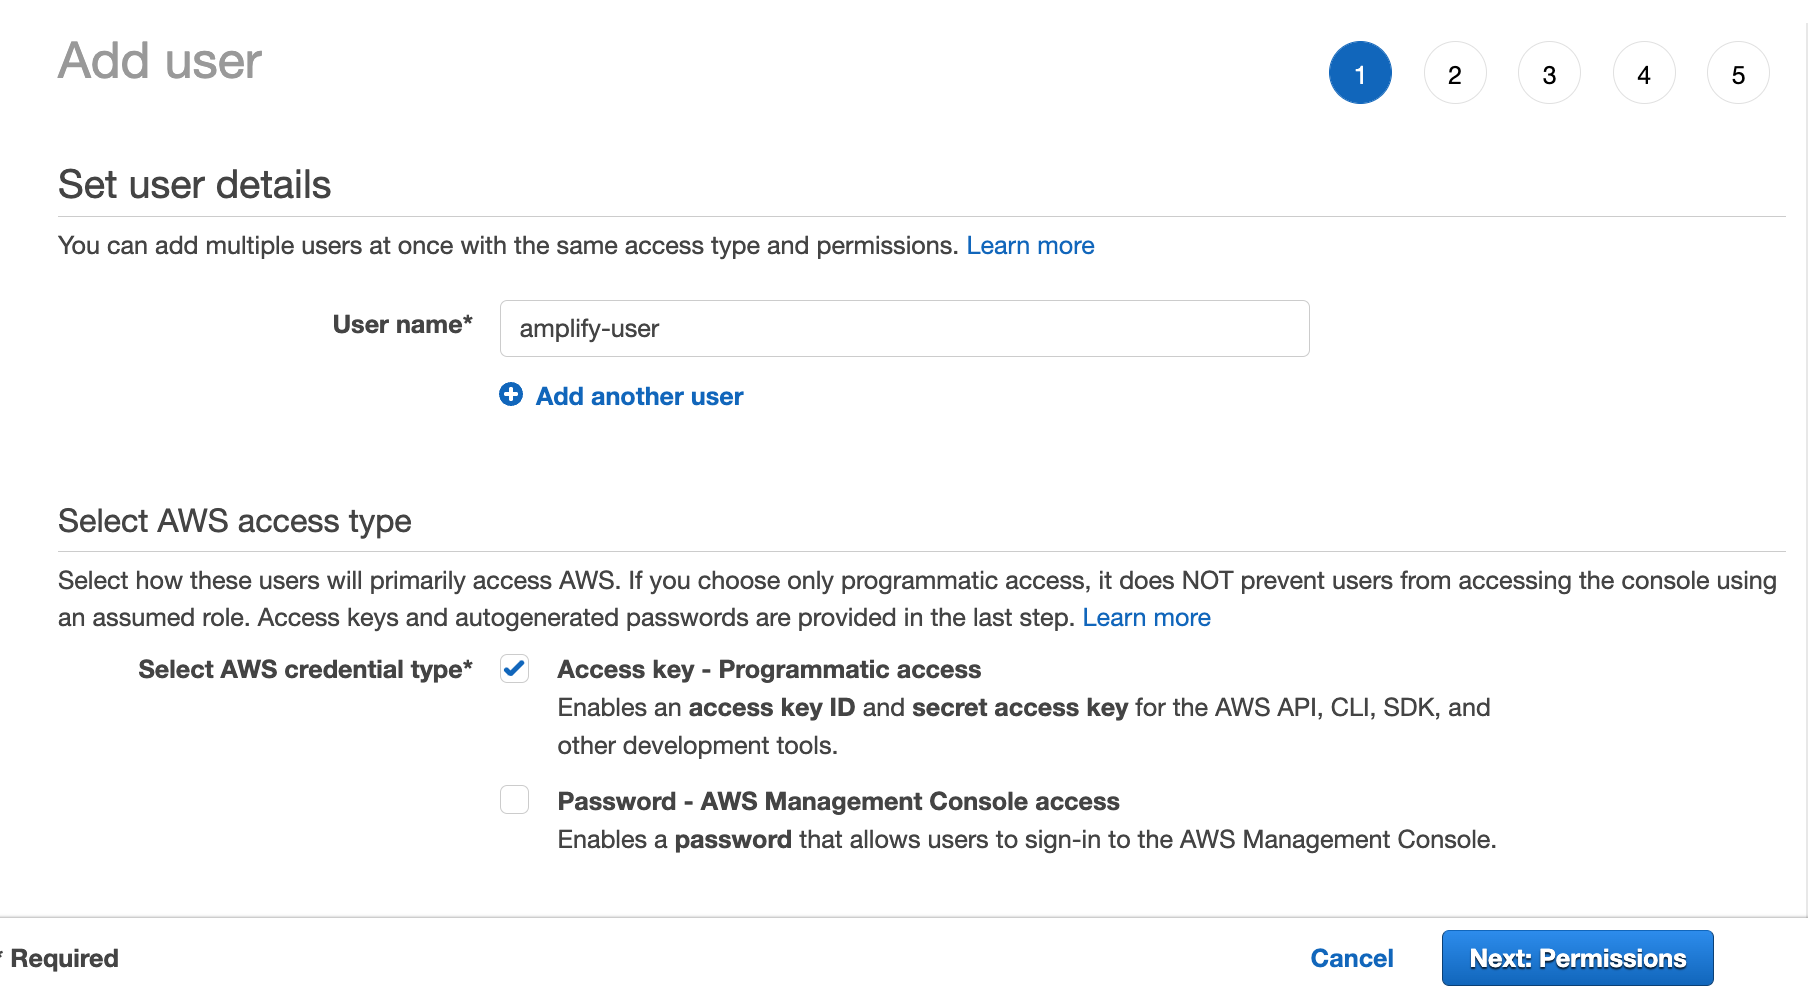
Complete the user creation using the AWS console: <URL>Once again, your browser will open and prompt you to finish creating the IAM user there. Start by entering in the user name and set the credential type to Access key, then click Next: Permissions.
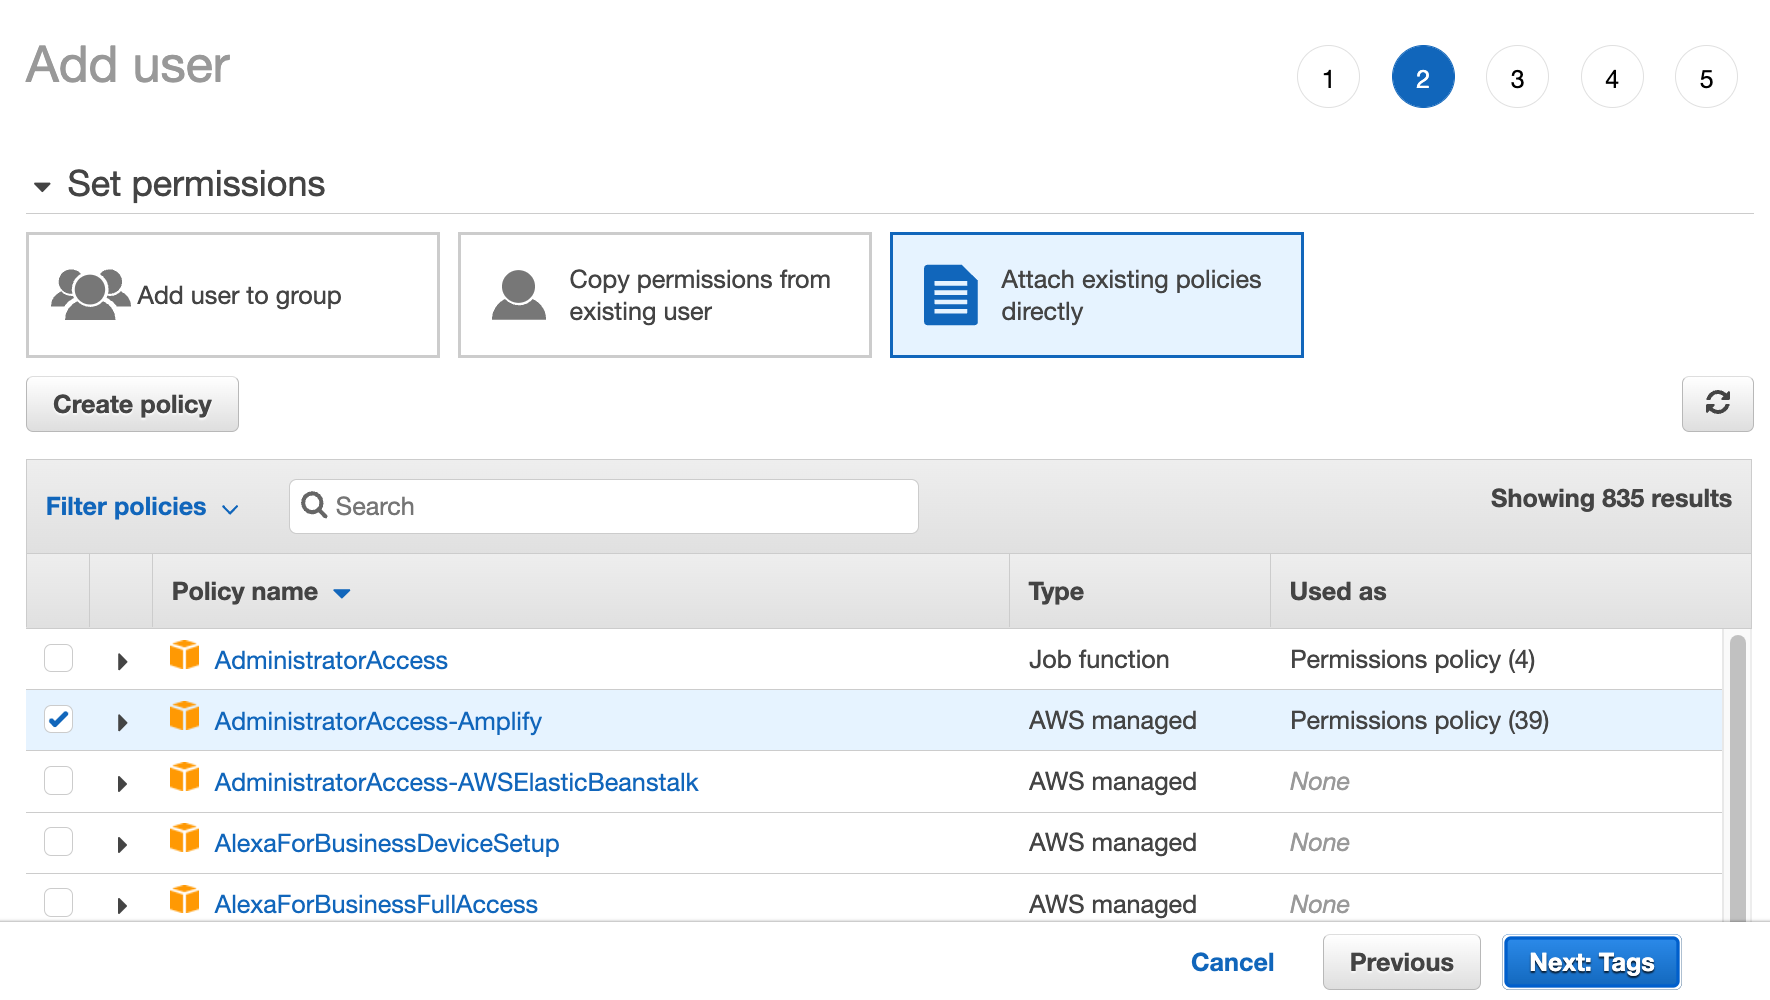
Next, ensure that AdministratorAccess-Amplify is selected and click Next: Tags.
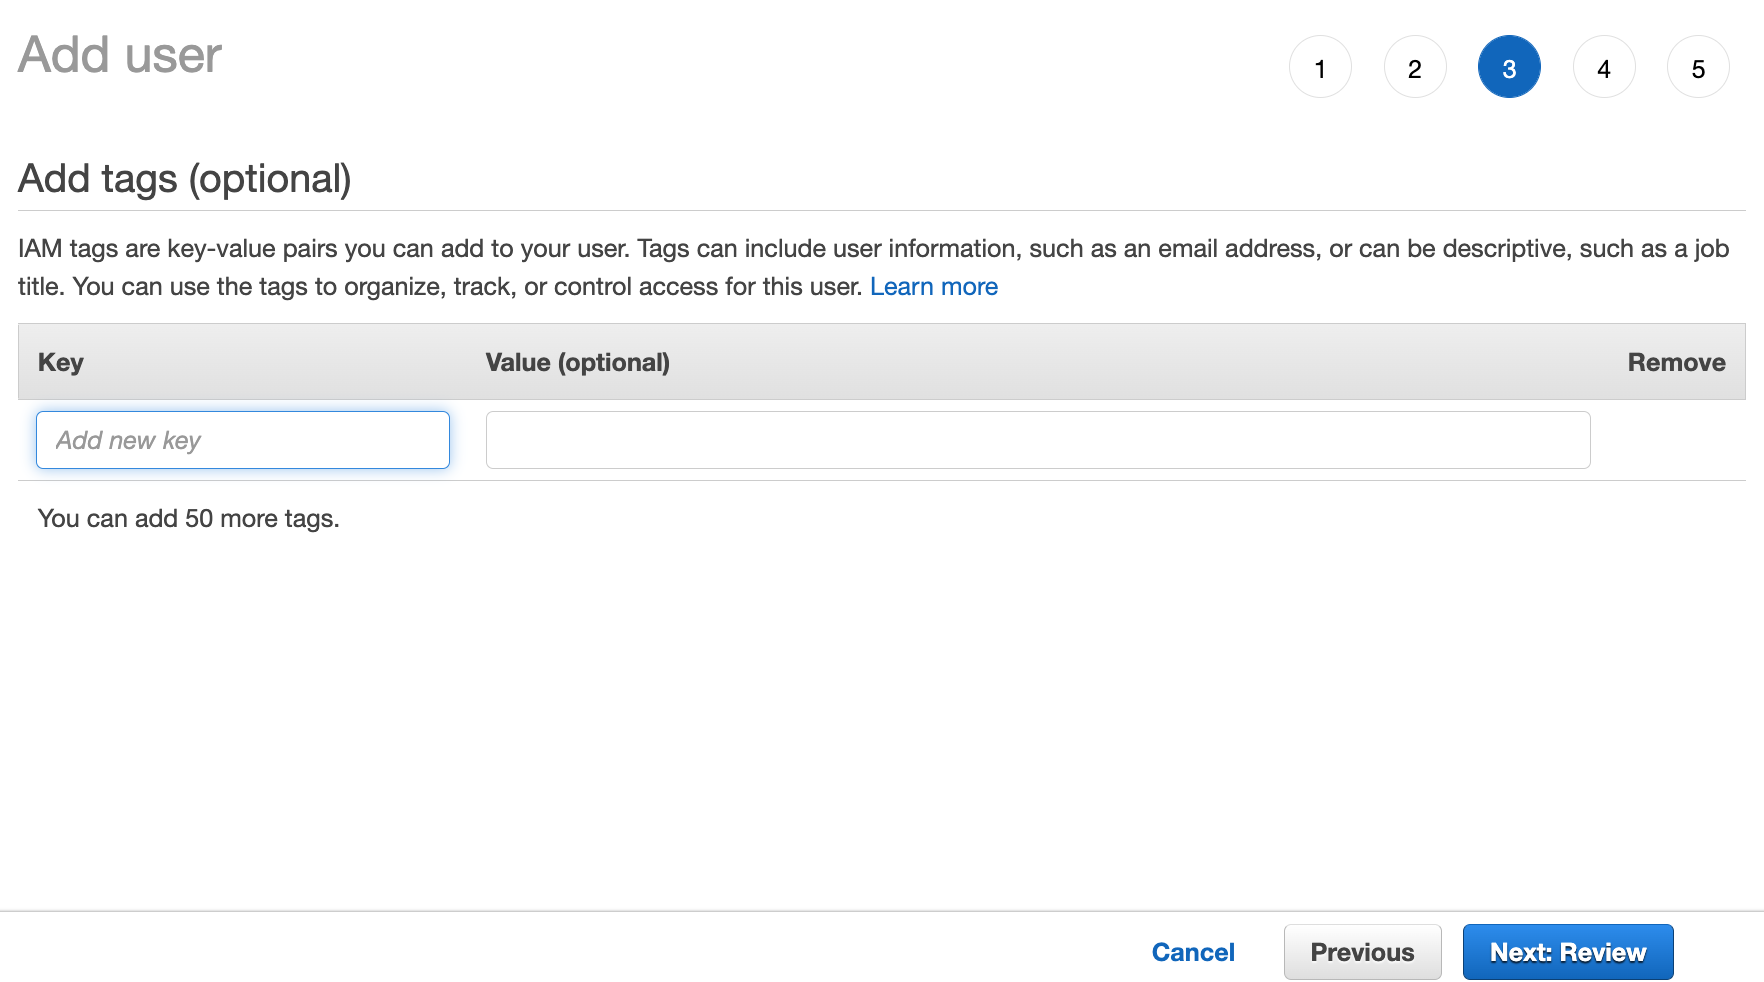
Tags aren’t required so we can simply click Next: Review.
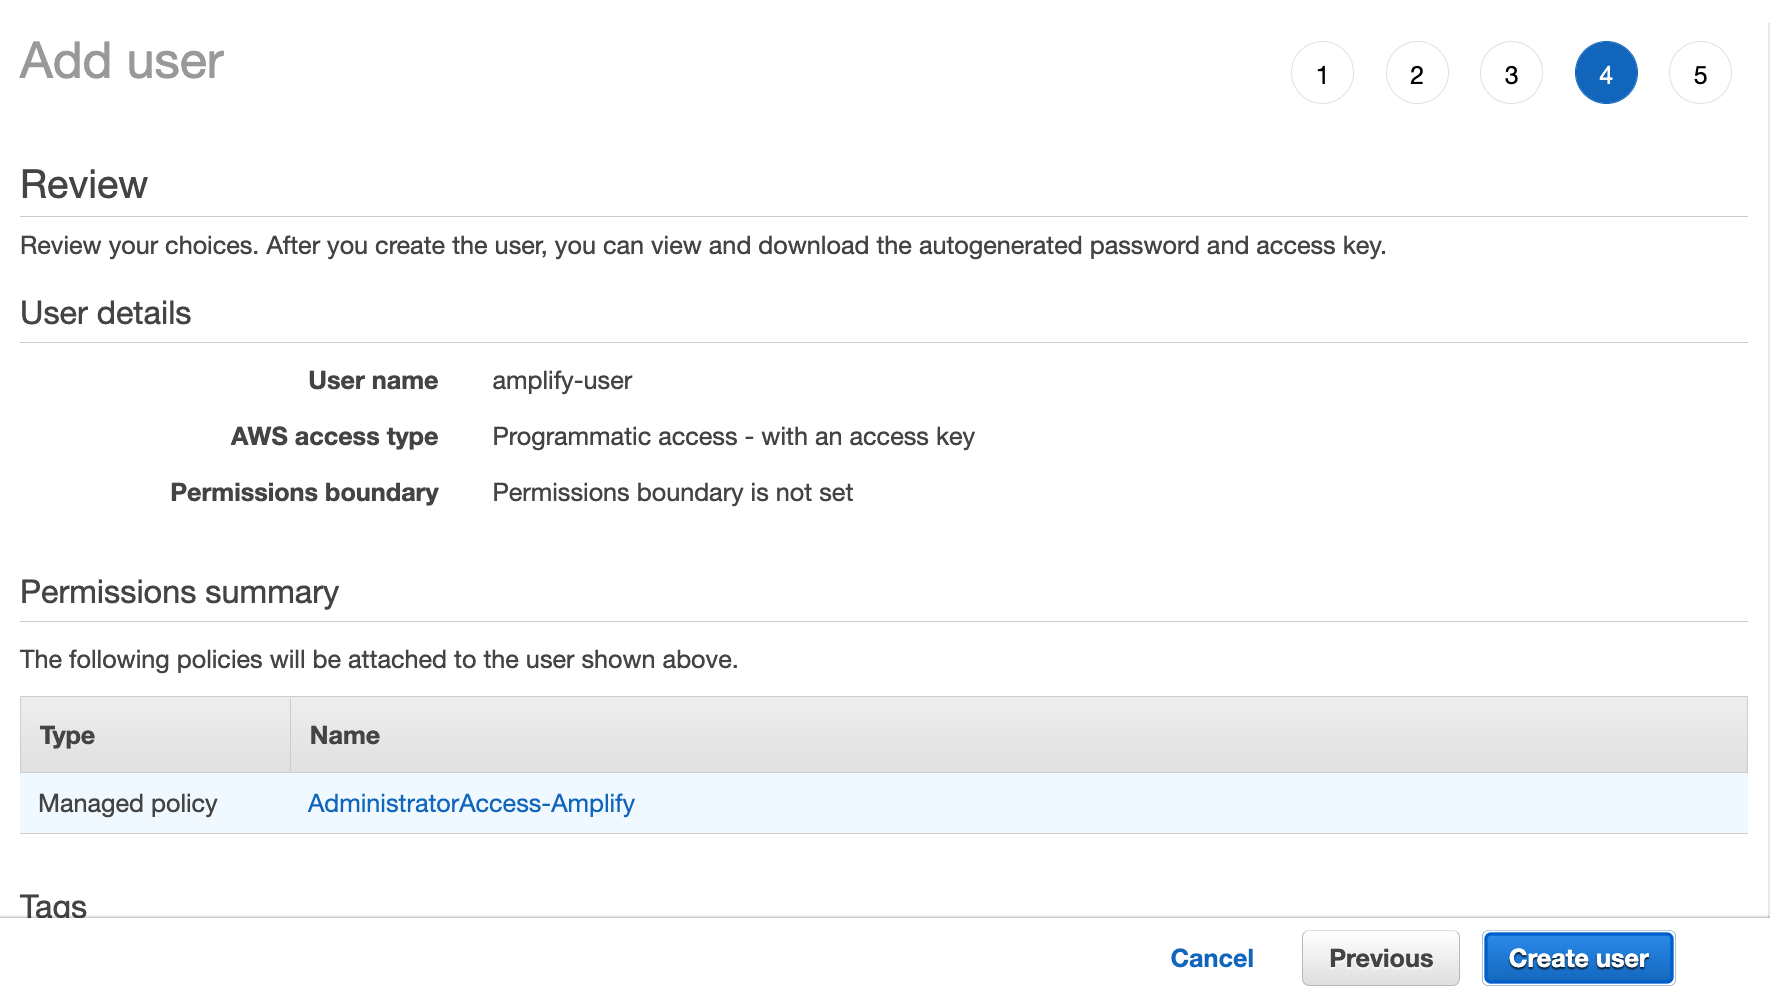
Review the user details and if everything looks correct, click Create user.
Finally, you will be presented with a page that contains both the Access key ID and Secret access key. These keys will be used by the Amplify CLI to spin up AWS resources on your behalf. It’s important that you don’t make these keys accessible to others for security purposes.
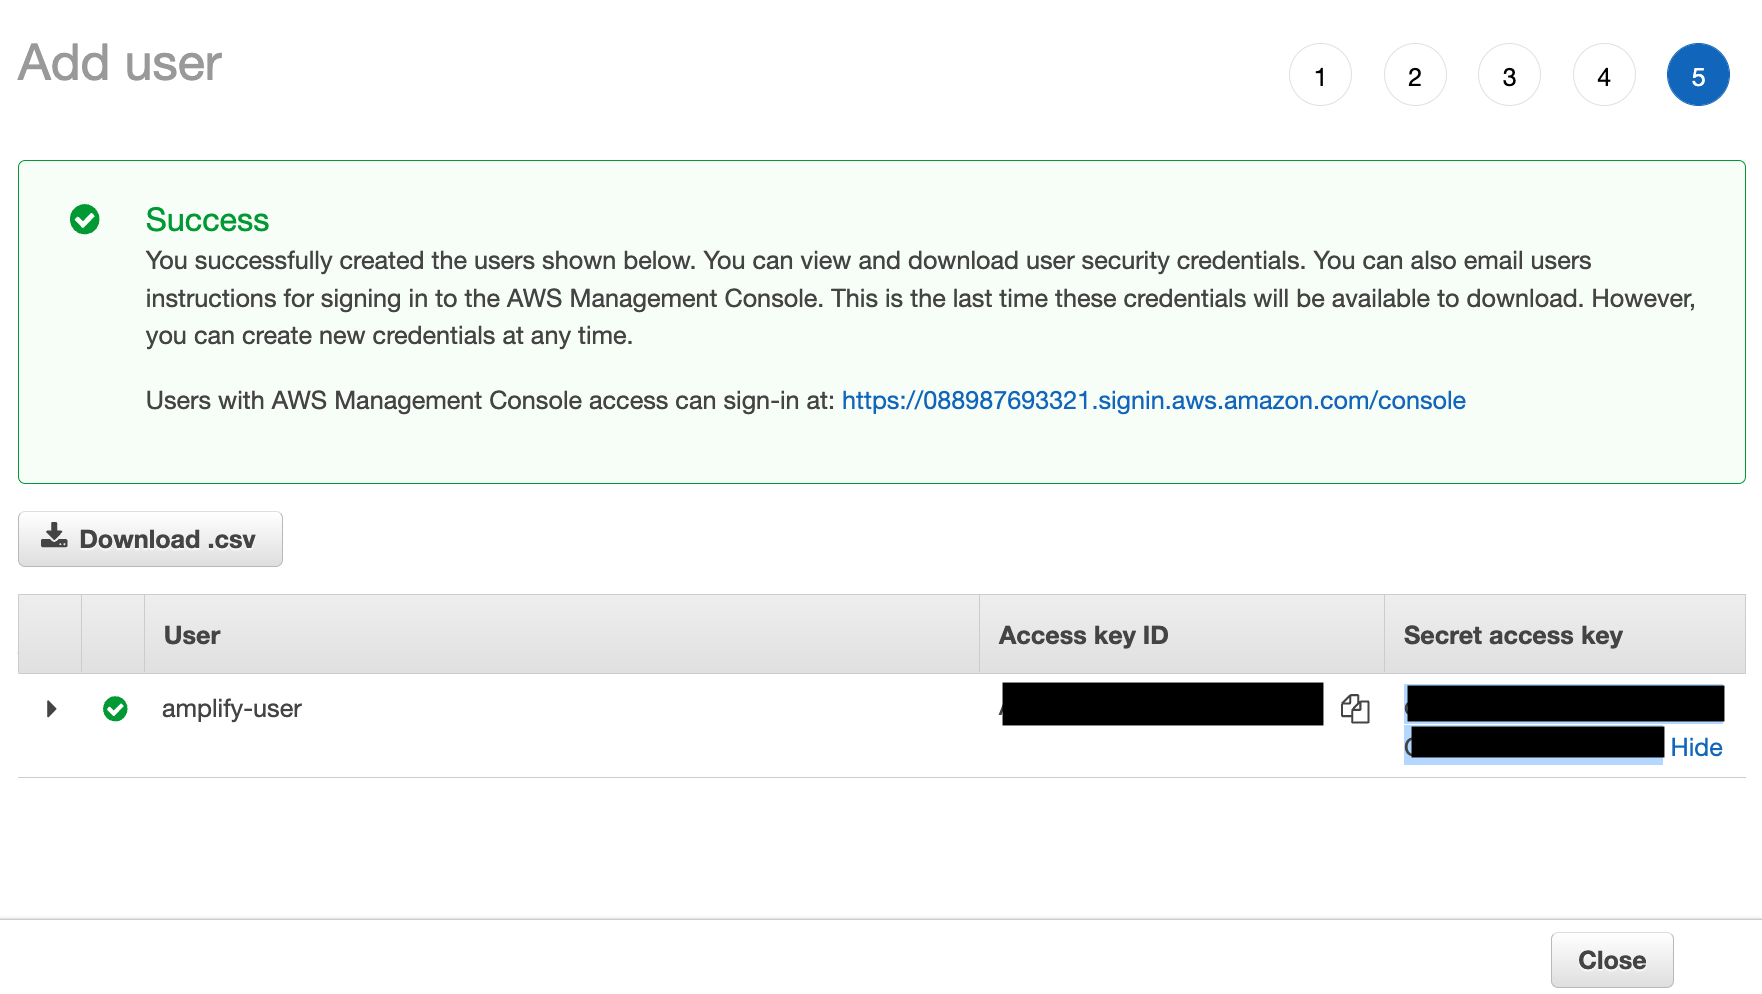
Navigate back to the terminal and hit Enter. When prompted, paste the keys for their respective prompts and give the profile a name.
Enter the access key of the newly created user:
? accessKeyId:
? secretAccessKey:
This would update/create the AWS Profile in your local machine
? Profile Name:  amplify-user
You should see the following output in the terminal if everything went as expected:
Successfully set up the new user.Initialize an Amplify Project
Next, navigate to your Xcode project directory:
cd PATH/TO/PROJECT/DIRECTORYEnter the following command to initialize an Amplify project in the root directory of your Xcode project:
amplify initThe CLI will recognize that you are working with a Swift project and will provide a default configuration that you we will use to get up and running.
? Enter a name for the project helloamplify
The following configuration will be applied:

Project information
| Name: helloamplify
| Environment: dev
| Default editor: Visual Studio Code
| App type: ios

? Initialize the project with the above configuration? Yes
Using default provider  awscloudformation
? Select the authentication method you want to use: AWS profile
? Please choose the profile you want to use amplify-user
✔ Help improve Amplify CLI by sharing non sensitive configurations on failures (y/N) · no
You can provide the default answers to each of the prompts by hitting Enter. You can see my answers in the snippet above.
Once you’ve successfully setup your Amplify project, you will see the following output in the terminal:
✅ Initialized your environment successfully.You should also see two new configuration files in your Xcode project as a result of your Amplify project being successfully configured:
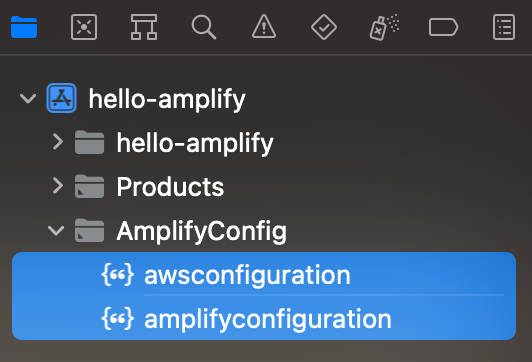
If the files weren’t automatically added to your project, you can simply open the root directory of your Xcode project in Finder and drag and drop the files into the Navigation pane in Xcode manually.
Add Amplify as a Dependency
Amplify can be added as a dependency in your project by adding it as a package using SPM (Swift Package Manager).
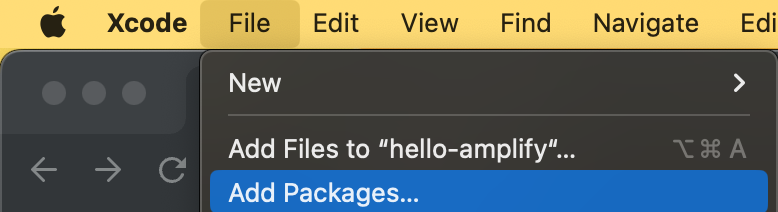
Navigate to the Search Package screen (File > Add Packages…):
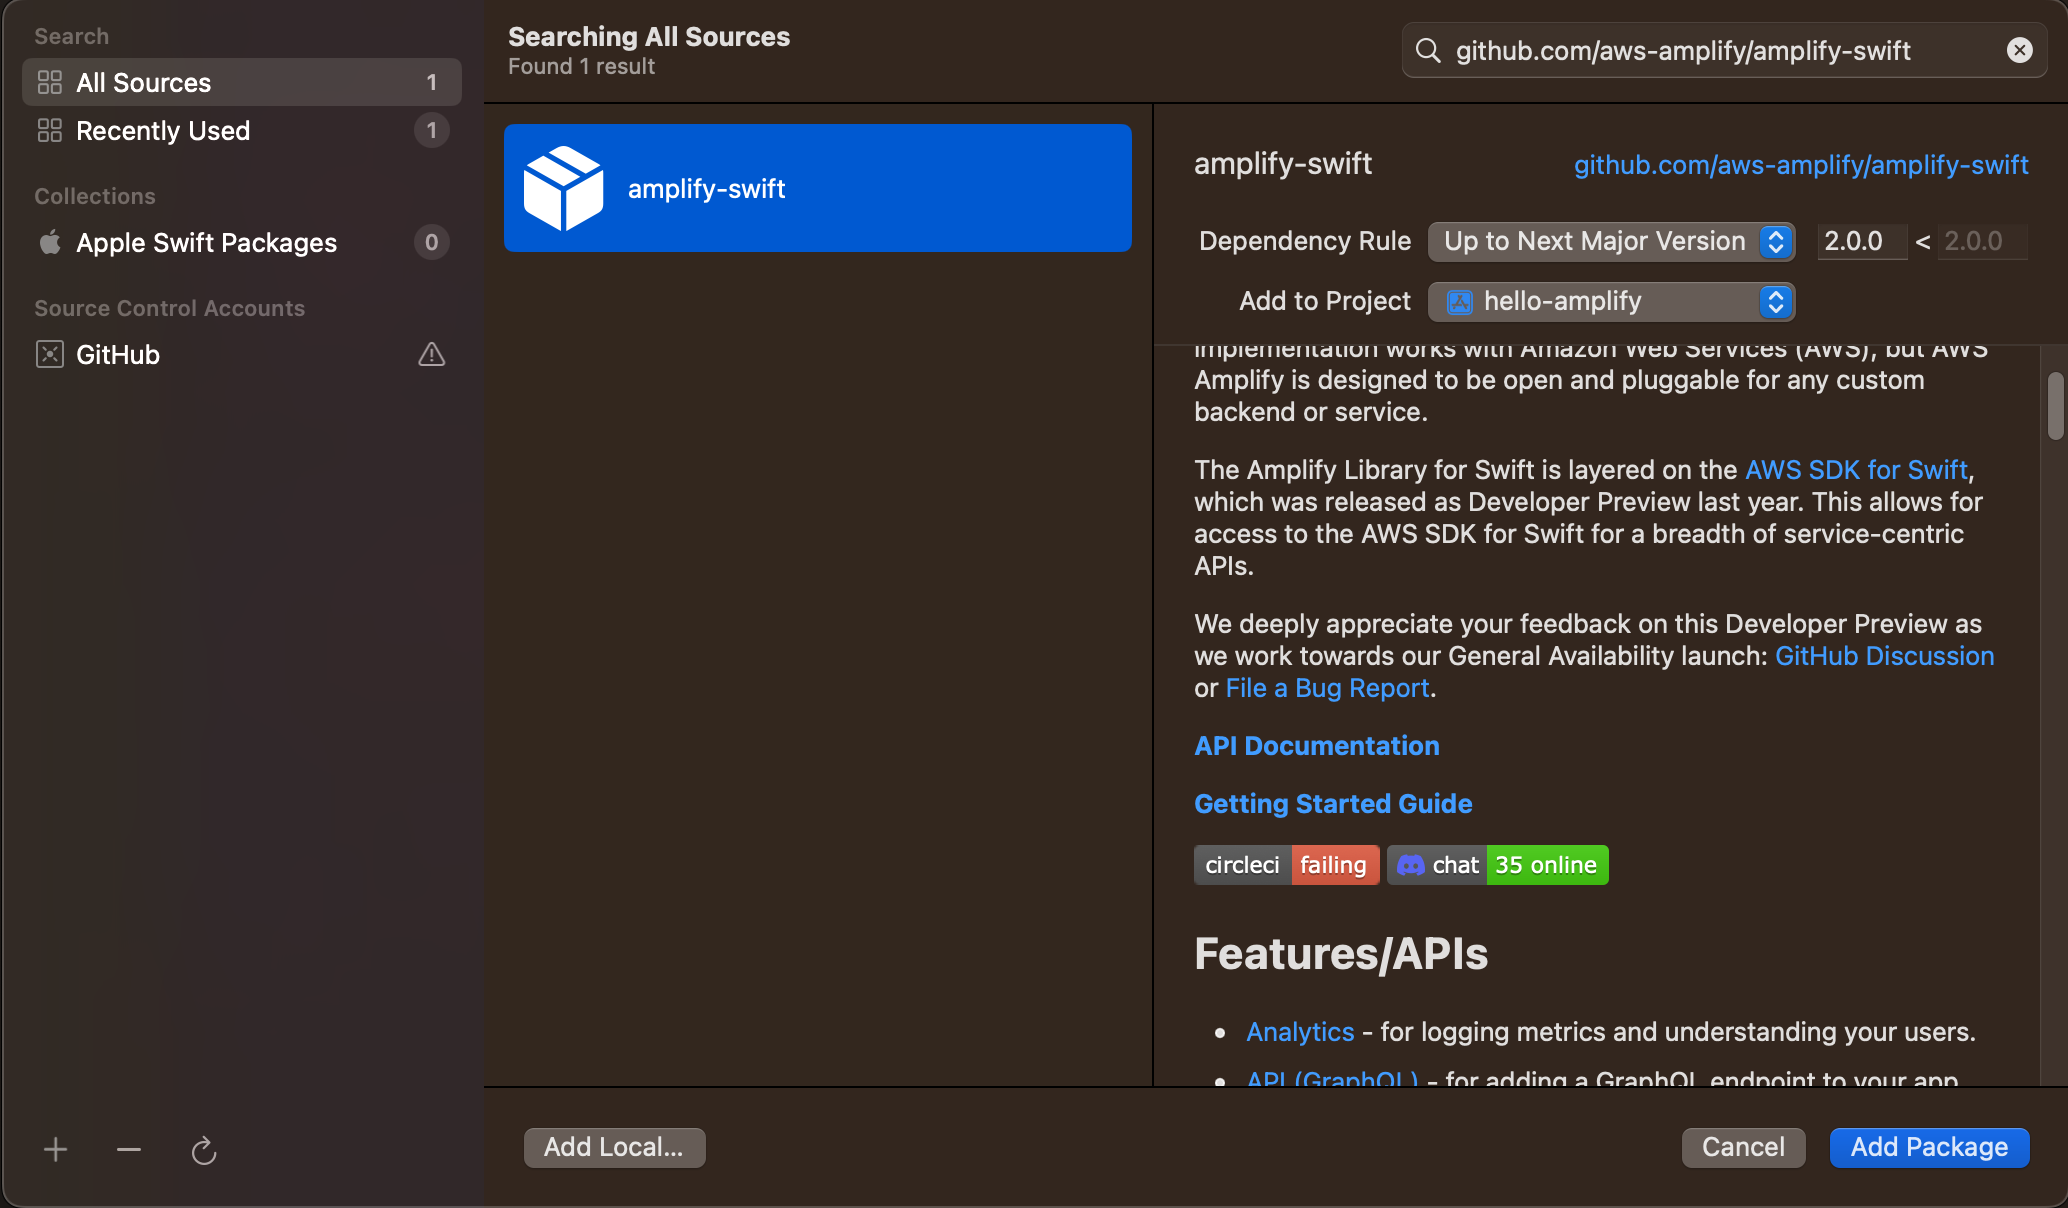
Enter the Amplify Libraries for Swift repository URL (https://github.com/aws-amplify/amplify-swift) in the search bar at the top right of the modal, select the amplify-swift, and click Add Package:
When presented with the Package Products modal, you only need to select Amplify and click Add Package:

Depending on the use case and the libraries you plan on using in your project, you will select the respective plugin and configure Amplify with each plugin you use. You can always update the selected package products as your project requires different libraries to handle different use cases.
Configure Amplify In Your Project
All that’s left now is to configure Amplify in your project at runtime. Start by adding an import statement at the top of the <YOUR_PROJECT_NAME>App.swift file:
import AmplifyCreate a function in the <YOUR_PROJECT_NAME>App object that will configure Amplify and the plugins (if any):
private func configureAmplify() {
    do {
        try Amplify.configure()
        print("Successfully configured Amplify")
    } catch {
        print("Could not configure Amplify", error)
    }
}
Adding a print log for both success and failure cases will make it clear whether Amplify was configured successfully or not.
Keep in mind that any errors you encounter at this point are likely due to your configuration files not being part of your Xcode project.
Lastly, call configureAmplify() in the init method of the <YOUR_PROJECT_NAME>App :
init() {
    configureAmplify()
}
configureAmplify()doesn’t have to be called in theinitmethod, it simply needs to be called before any of the Amplify resources are called/used or else your application will crash. CallingconfigureAmplify()here ensures Amplify is configured as soon as possible, thus avoiding the possibility of a crash for an unconfigured resource.
Build and run the project and you should see the following output in the Xcode console:
Successfully configured Amplify